
Table of Contents
- Identify Your Grout Type Before Cleaning
- What You’ll Need: Tools and Materials
- Step-by-Step Process to Clean Deeply Stained Grout
- Best Grout Cleaner for Old Stains: DIY vs. Commercial
- Removing Stubborn Stains and Mildew
- Safety Precautions When Using Chemical Cleaners
- Grout Sealing After Cleaning
- DIY vs. Professional Grout Cleaning: When to Call an Expert
- Frequently Asked Questions
Last Updated: September 18, 2026
Identify Your Grout Type Before Cleaning
The grout in your tile isn’t all the same. Cement grout, epoxy grout, and urethane grout each respond differently to cleaning methods and chemicals. Picking the wrong approach can damage your tile or grout permanently, so identifying your grout type is the essential first step.
How to Identify Your Grout Type
Cement grout (most common) is porous, chalky, and crumbles slightly when scratched with a coin. It absorbs water and stains easily, which is why it discolors faster than other types. Cement grout is typically used in residential bathrooms and kitchens installed before 2010. If you’re unsure, assume cement, it’s the safest default for most homes.
Epoxy grout is hard, glossy, and does not crumble when scratched. It resists stains and moisture far better than cement. Epoxy is more expensive and less common in older homes, but increasingly popular in new construction and high-moisture areas. It’s often used in commercial kitchens and pools because of its durability.
Urethane grout falls between cement and epoxy in hardness and stain resistance. It’s less common than the other two but offers better water resistance than cement without the cost of epoxy.
Why Grout Type Determines Your Cleaning Method
Acidic cleaners (vinegar, lemon juice, citric acid) work well on cement grout and dissolve mineral deposits effectively. However, acidic cleaners can etch and dull epoxy grout permanently, creating visible damage that cannot be reversed. Alkaline cleaners (baking soda, commercial grout cleaners) are safer for epoxy but work more slowly on mineral stains.
Scrubbing pressure also varies by type. Old cement grout can crack if scrubbed too aggressively with a stiff brush, especially if it’s already weakened by age or moisture. Epoxy grout tolerates harder scrubbing without damage. Urethane grout falls in between.
Test Before Committing
Before applying any cleaner to visible grout, test it on a hidden area first, inside a closet, under a vanity, or in a corner of the basement. Apply your chosen cleaner, let it sit for the recommended time, scrub gently, and rinse completely. Wait 24 hours and inspect the grout for discoloration, etching, or texture changes.
This test takes 15 minutes of active time but prevents costly damage to visible grout lines. If the test area shows any dulling, fading, or pitting, do not use that cleaner on the rest of your grout.
What You’ll Need: Tools and Materials
DIY Cleaning Supplies
The best grout stain removal starts with what you already have at home. Baking soda and hydrogen peroxide form a paste that works on most stains. Mix equal parts baking soda and hydrogen peroxide until you get a thick paste.
For mineral deposits or hard water stains, acidic solutions cut through buildup. White vinegar works, though it’s weaker than commercial options. Some people add a few drops of dish soap to help the paste stick to vertical grout lines.
Other options include:
- Oxygen-based cleaners (gentler than bleach)
- Borax mixed with water (good for mildew)
- Lemon juice (natural acid, pleasant smell)
Skip bleach on colored grout. It can fade the color permanently.
Equipment and Safety Gear
You need the right tools to reach grout lines without damaging tile. A stiff-bristled brush works best for scrubbing grout joints. Soft brushes won’t generate enough friction to break up stains.
A toothbrush handles corners and tight spaces. An old electric toothbrush speeds up scrubbing without the arm fatigue.
For safety when using any chemical cleaner:
- Wear rubber gloves to protect skin
- Use eye protection if splashing is possible
- Ensure good ventilation (open windows, run a fan)
- Never mix cleaners (bleach plus ammonia creates toxic gas)
- Keep the area dry before applying cleaners
A microfiber cloth or old towel rinses away residue.
Step-by-Step Process to Clean Deeply Stained Grout
Step 1: Prepare the Area and Test Your Cleaner
Clear the tile surface of loose debris first. Sweep or vacuum the grout lines. Remove any mold or mildew buildup with a dry brush.
Step 2: Apply Your Cleaning Solution
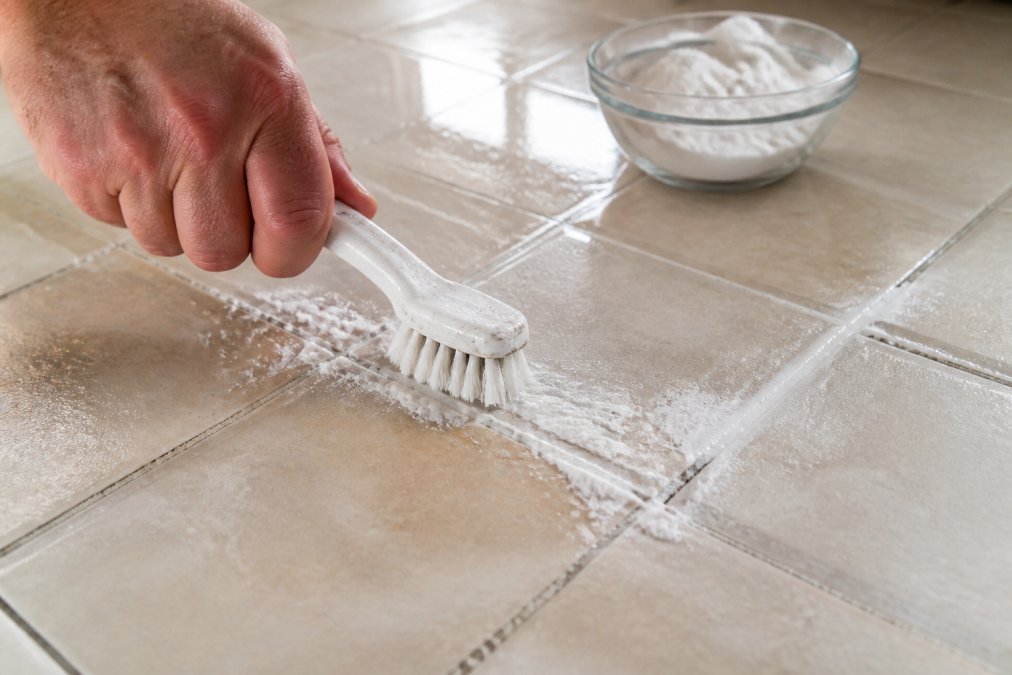
Spread your cleaning paste directly onto the grout lines. Use an old toothbrush or small applicator to work it into the porous surface. The paste should stay wet long enough to soak into the grout.
Step 3: Scrub the Grout Lines
Use firm, circular motions with your brush. Press down hard enough to feel resistance. Scrubbing loosens the paste and works it deeper into the porous grout surface.
Step 4: Rinse Thoroughly
Rinse the grout with clean water. Use a spray bottle or a damp cloth to flush away all paste residue. Incomplete rinsing leaves cleaner residue that hardens and looks worse than the original stain.
Best Grout Cleaner for Old Stains: DIY vs. Commercial
Baking Soda and Hydrogen Peroxide Paste
This combination is the most popular DIY approach and the safest starting point for most grout types. Baking soda is mildly abrasive and slightly alkaline, making it gentle enough for epoxy grout. Hydrogen peroxide is a mild oxidizing agent that lifts organic discoloration without etching.
Acidic Solutions for Mineral Deposits
Hard water stains and mineral buildup respond better to acidic cleaners. White vinegar, lemon juice, or citric acid dissolve mineral deposits that alkaline cleaners miss. These solutions work by breaking down the chemical bonds in mineral scale.
Commercial Alkaline Cleaners
Store-bought grout cleaners use alkaline chemistry to lift organic stains like mold, mildew, and soap scum. They’re stronger than DIY pastes and work faster, typically showing results within one application.
When DIY Fails: Escalation Path
If your grout doesn’t improve after two applications of baking soda paste, or after one application of a commercial cleaner, the stain may be too deep or permanent for surface cleaning alone.
At this point, you have three options:
Grout pens or colorant. If the stain is permanent but the grout is structurally sound, grout pens (available at hardware stores for $5-$15) can restore appearance by covering discoloration. This is cosmetic, not cleaning, but effective for old stains that won’t lift.
Professional grout cleaning. Commercial-grade equipment and specialized cleaners can reach deeper into pores than DIY methods. Professional services use pressure and extraction techniques that pull stains from below the surface. This is appropriate for large areas or stains that have resisted multiple DIY attempts.
Grout replacement. If grout is cracked, crumbling, or permanently stained, re-grouting may be necessary. This involves removing old grout with a grout saw and applying new grout. It’s labor-intensive but restores both appearance and structural integrity. This option is appropriate only if grout is damaged or if staining is extensive across an entire room.
For old stains on cement grout, start with the baking soda and hydrogen peroxide paste. If that doesn’t work after two applications, move to a commercial alkaline cleaner. Save acidic solutions for mineral deposits only, and limit their use to prevent long-term erosion of cement grout.
Removing Stubborn Stains and Mildew
Some stains don’t respond to standard cleaning. Mold and mildew need different treatment than dirt or mineral deposits.
Safety Precautions When Using Chemical Cleaners
Never mix cleaners. Bleach plus ammonia creates chlorine gas, which is deadly (the CDC). Bleach plus acidic cleaners releases toxic chlorine gas as well.
Never use bleach on colored grout. It strips the color permanently, leaving white or faded patches. This damage cannot be reversed.
Grout Sealing After Cleaning
Cleaning removes surface stains but doesn’t protect grout from future damage. Sealing fills the pores of cement grout, making it resistant to stains and moisture.
DIY vs. Professional Grout Cleaning: When to Call an Expert
DIY cleaning works for light to moderate stains on small areas. If your grout is mildly discolored but still visible, home methods will restore it.
Professional cleaning makes sense when:
- Stains cover a large area (entire bathroom or kitchen)
- Stains are very old and deep
- You have natural stone tile that requires special care
- Grout is cracked or damaged and needs repair
- You want guaranteed results before a home sale or rental turnover
Frequently Asked Questions
Does hydrogen peroxide really clean grout?
Yes, hydrogen peroxide works effectively on grout because it creates a chemical reaction that lifts dirt and discoloration from the porous surface. When combined with baking soda into a paste consistency, it becomes more abrasive and reaches deeper into grout lines. For best results, apply the paste, let it sit for 5-10 minutes (dwell time matters), then scrub with a stiff-bristled brush or toothbrush. Rinse thoroughly with water.
What should you not clean grout with?
Avoid using bleach on colored grout, as it can cause permanent discoloration. Don’t use acidic solutions like vinegar on natural stone tiles, as the acid can damage the surface. Avoid mixing cleaners (especially bleach with ammonia), which creates toxic fumes. Stay away from highly abrasive scrubbing tools on delicate grout types, and never use pressure washers on grout joints without professional guidance, as they can erode the grout and damage the tile.
How often should you deep clean tile and grout?
Most homeowners should deep clean tile and grout every 6-12 months, depending on foot traffic and moisture exposure. Bathrooms and kitchens may need cleaning every 3-6 months due to mildew and mold growth. Regular maintenance cleaning (weekly or monthly) with a microfiber cloth and mild cleaner helps prevent stubborn stains from forming and extends the time between deep cleans. Sealing grout after cleaning can reduce how often you need to perform deep cleaning.
When is it time to hire a professional for grout restoration?
Consider professional grout cleaning when DIY methods fail after multiple attempts, when grout shows signs of efflorescence (white mineral buildup) that won’t respond to standard cleaners, or when stains are embedded so deeply they’ve discolored the grout permanently. Professionals use commercial-grade equipment and alkaline or acidic solutions tailored to your specific grout type. If grout is crumbling, missing, or if you’re concerned about damaging older tile, professional restoration ensures the work is done correctly without long-term material impact.
Deeply stained grout doesn’t have to stay that way. Whether you tackle it yourself with baking soda and hydrogen peroxide or bring in professionals, the key is addressing it before stains become permanent. If your DIY efforts aren’t delivering the clean grout you want, Spotless Pressure Washing, Carpet Cleaning & Tile & Grout Cleaning can restore your tile with proven methods and commercial-grade results. Get a free quote and see how we can transform your grout back to clean.